It boggles the mind. . .
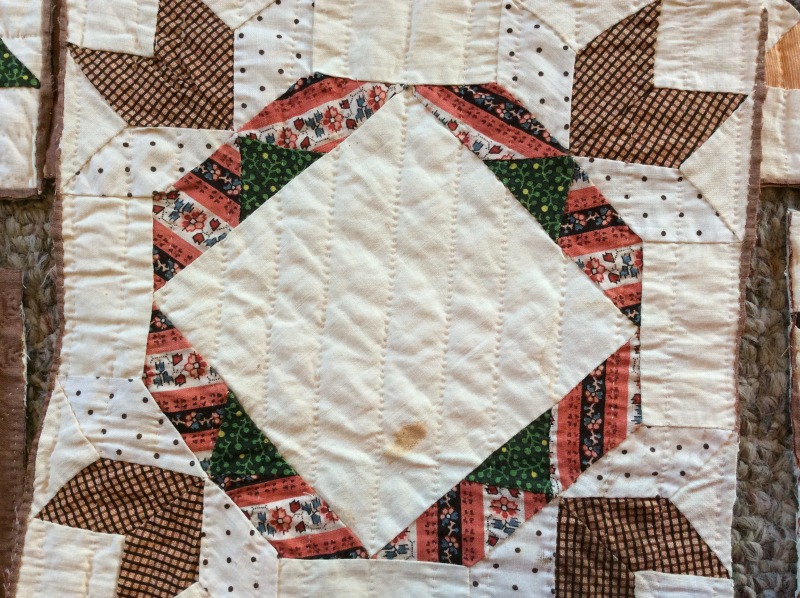
One can only speculate the reasons why a beautiful quilt would end up all cut to pieces. I like to tell myself that the antique quilt was so far beyond restoration the dealer thought it better to sell off the individual blocks than the damaged quilt as a whole. I do see some extreme fading on the alternate block, but who really knows for sure why this beauty was cut up!
In an earlier blog post, I admitted to cutting up a c1930s Grandmother’s flower garden quilt in order to salvage what remained of a very tattered quilt – a request by the owner of the quilt and daughter of the maker. Not only did I feel inclined to honor her request, I knew that the finished pieces which left my home would be esthetically more pleasing than what she had, and therefore more likely to be kept as a family treasure. As I cut up that soft, sweet, nearly eighty-year-old quilt, I thought about all the hours that went into it’s making. I have done some English paper piecing with hexagons so I know the hours upon hours it takes to make something that measures the size of a queen sized quilt. And while it is possible to machine piece those buggers, I know this quilt was all made by hand, so the labor hours alone were too many to think of without making me sick in my middle while I cut it apart. But now, on the back side of the whole project, I feel good about what became of the cut up quilt. And that spurred me into action with some pieces I picked up at Road to California earlier this year.
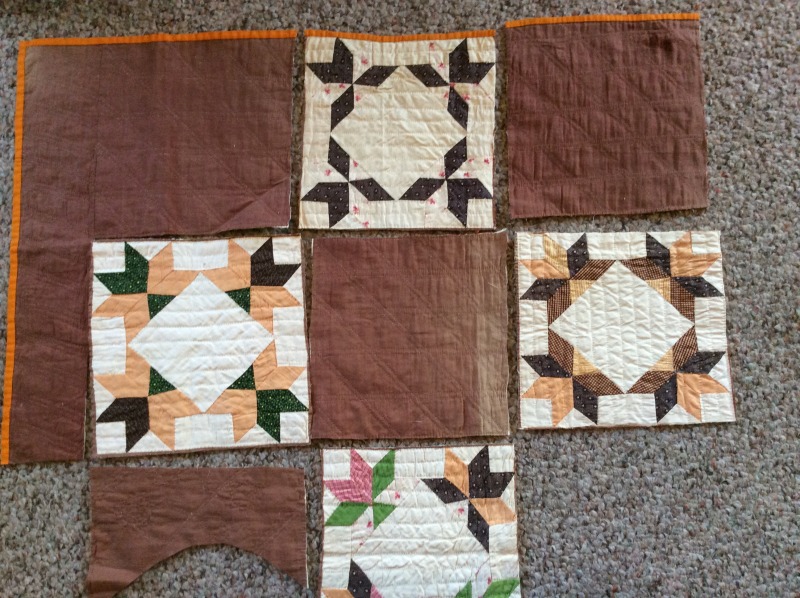
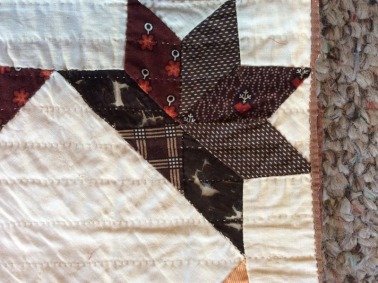
In one of the antique quilt dealer’s booths at the show, I came upon a plastic bag sporting some quilt blocks that were in really nice condition. First thing I noticed was that they were 3rd quarter 19th century (c1850-70s). The next thing I noticed is that they were quilted, not just blocks that had never been incorporated into a quilt. These blocks had been part of a larger quilted item and had been cut just outside or right along the seam line of the adjoining piece. I pulled them from the stack and sat on the floor in the isle right in the middle of the quilt show and pondered what had happened. “Why on earth had these perfectly good blocks been cut from their quilt?” Then I wonder if there were any more in the tub. . . and sure enough, there were two more bags of ten blocks in each bag. That was a total of thirty blocks! I sat on the floor trying to decide what to do about these fragments – I had already put an antique quilt aside to purchase and wasn’t really in the market for blocks. The pieces yelled at me, “DON’T LEAVE US! TAKE US HOME!” (I hear these kind of voices in my head more often than I should!) My mind began to justify bringing them into my home and adding them to my collection. You see, I try not to purchase anything that can’t be used in my business in one capacity or another in lectures and workshops. These really didn’t fit into any of the categories I have laid out for purchases, e.g., books, quilts, hankies, old photographs, etc..
Well, you guessed it, I took them home – and I didn’t pay a whole lot for them. When I got them up to the cash register, the booth owner said, “Hey, would you like all the other parts that go with that quilt? I’ll throw them in for nothing! Its just the cuttings” BONUS! I smiled and said thank you as she dug out the plastic bag of alternate blocks and borders with binding. I wanted to ask why the quilt was all cut apart, but honestly, I didn’t have the nerve. I was afraid of what she might say, and quite frankly, I thought I would would be arrested for assault if the answer was, “To make stuffed animals!”
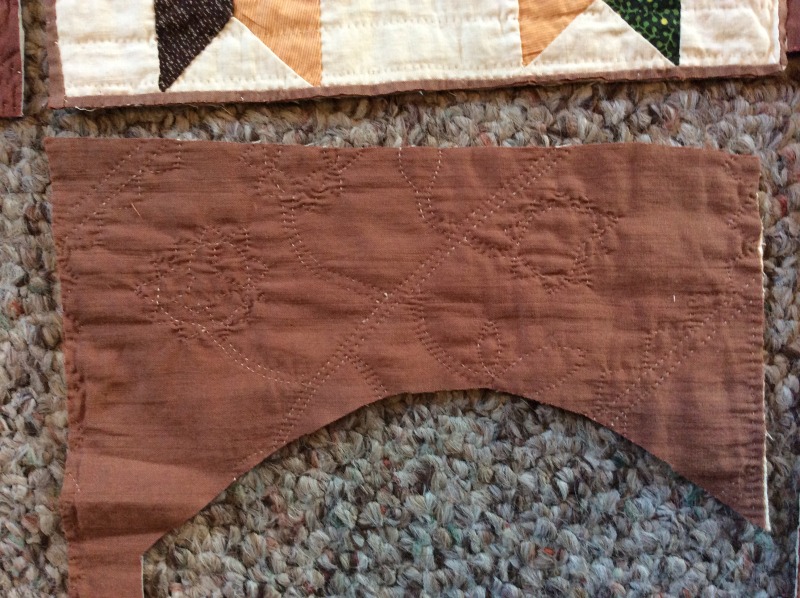
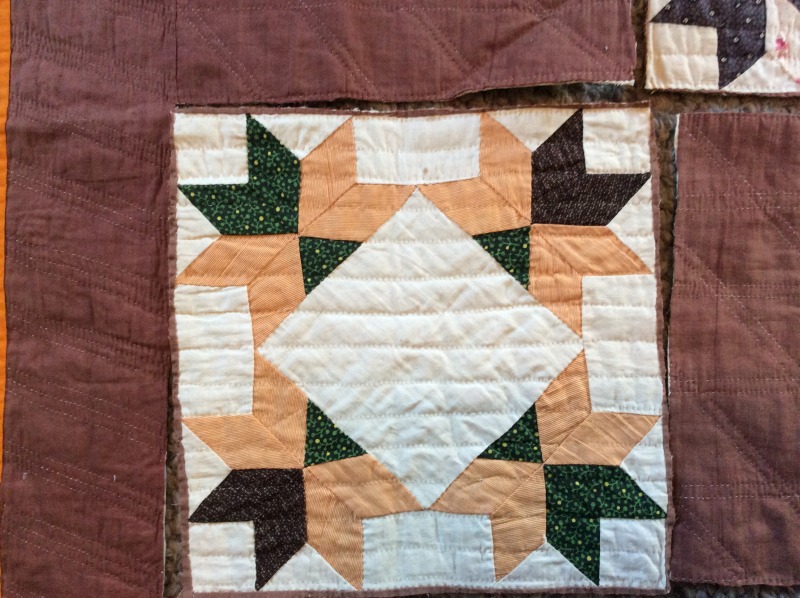
You can see from the pictures that the quilting is quite lovely and depicts flowers in some places. I wish I had a time machine. I would go back to see this beauty in its just finished state. I would smile alongside the maker at how the blocks twinkled and the fabrics she had on hand were perfect for the flowers she depicted. I would compliment her choice of purple, pink and madder combinations. And I would ask WHY? to that bright orange binding – not with a snarky tone, but in earnest, because I thought I was the only one who would do something so outrageous as use chrome orange for a binding.
They are mine, now what?
When you don’t know what to do, do nothing! That’s my mantra when it comes to washing, repairing, or taking apart old quilts. And that is just what I have done for the past ten months. I have looked at these blocks and pieces over and over trying to decide what to do with them. I have calculated how much I would need to reassemble the original quilt in a smaller size, I have tried to imagine them as pieces used in study sessions for learning about old quilts. Basically, I’ve run the gauntlet of options for these pieces, including selling them so they could become someone else’s concern. But I kept coming back to the same choice – I would find a way to reassemble them so that some integrity of the original quilt was maintained and the piece could be used in the collection.
Recently I have seen some wonderful “potholder” quilts and read about how to make them. This type of quilting is done by completing one block (piecing, quilting and binding all completed) and stitching it to another completed block. This technique creates the affect of sashing between blocks. It’s not a new technique, in fact it was used during the Civil War to make US Sanitary Commission Quilts for soldiers. You can read more about pot holder quilts and US Sanitary Commission research done by Don Beld and Pam Weeks in their new book Civil War Quilts and featured on Barbara Brackman’s Civil War blog.
In the case of my blocks, I have decided to just sew them together using a whip stitch rather than bind them before assembly – I have seen this method used to assemble parts from two different early quilts into a single quilt. Because some of my pieces are cut right along the seam line, it will cut off the points in the pieced blocks, but there’s not much that can be done about that. Since I don’t have enough of the alternate blocks to recreate the quilt in an alternate block setting (which from what I can surmise was the original setting), I have cut the alternate block pieces into sashing. Flipping the cornerstones upside down (to show the back) allows them to be white and different from the sashing. I selected the 12 best blocks for my reassemble and I just happened to have a solid cheddar that is pretty close to the original binding. I will not add on outer borders like the original quilt because there is just not enough of the alternate block to make it all the way round.

I have started to whip stitch them together in this layout with 3 x 4 blocks. Binding will be chrome orange (cheddar).
I think the layout is nice and maintains some of the integrity of the original quilt. The size is perfect to display or bring along to lectures. And it allows me to show what can be achieved when someone else’s thought process goes awry while they wield a pair of scissors.
Thanks for letting me share this experience with you – I hope you enjoyed the post and will share with your friends. Check back soon to see the finished quilt!
Leah
And remember, Sunday posts focus on my novel, Libby Morgan: Reunion. Tune in this Sunday for an excerpt from the book and a peek into the past.
